![]()
Shortcrust Pastry uncooked
Shortcrust pastry is used for lots of pie dishes. It sounds a bit daunting but as this recipe shows, follow the instructions and you will end up with delightful, light and crisp pastry.
85 grams / 3oz lard
340 grams / 12 oz plain flour plus a very small amount more for use in rolling out the pastry
Four and a half tablespoons of water
Whatever mixture of fat is used, the proportions of fat to flour should be maintained - twice the weight of flour to that of the fat.
It is quite possible to buy ready made shortcrust pastry at your supermarket, normally it is frozen. This makes excellent shortcrust pastry but never as good as freshly made pastry. It also has a couple of disadvantages.
Firstly, it is more expensive compared to home made pastry. The second disadvantage is not so obvious, the size of a sheet of ready made pastry is fixed, and if it is slightly smaller than you require then two sheets will be required.
Secondly, it is ofte frozen. You will need to remember to defrost it before use which can take much of the spontaneity out of baking.
Our shortcrust pastry recipe below has lots of pictures, but you can also view our video by clicking on the YouTube video below.
VIDEO - HOW TO MAKE SHORTCRUST PASTRY
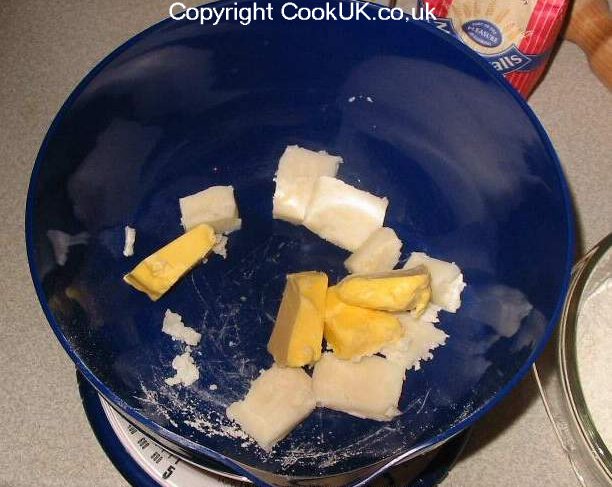
Add the cooking margarine and lard to a large bowl (cut into lumps) and sieve in the the flour.
![]()
Lard and cooking margarine cut into blocks
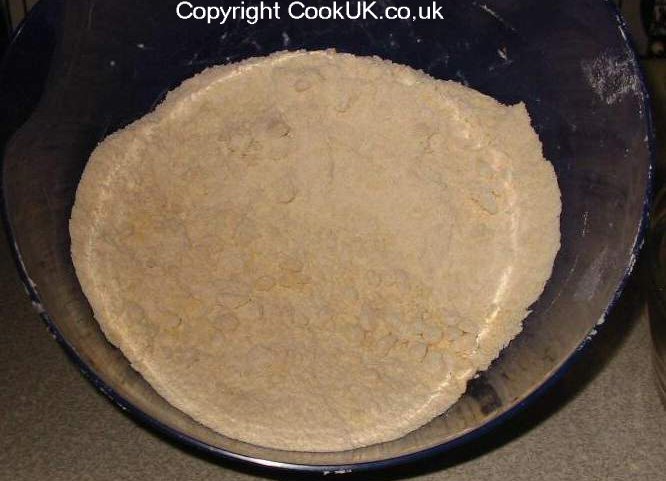
The mixture should end up as small crumbs although some larger bits may be present. Don't overdo this stage, it should only take three or four minutes.
![]()
Crumbly shortcrust pastry mixture
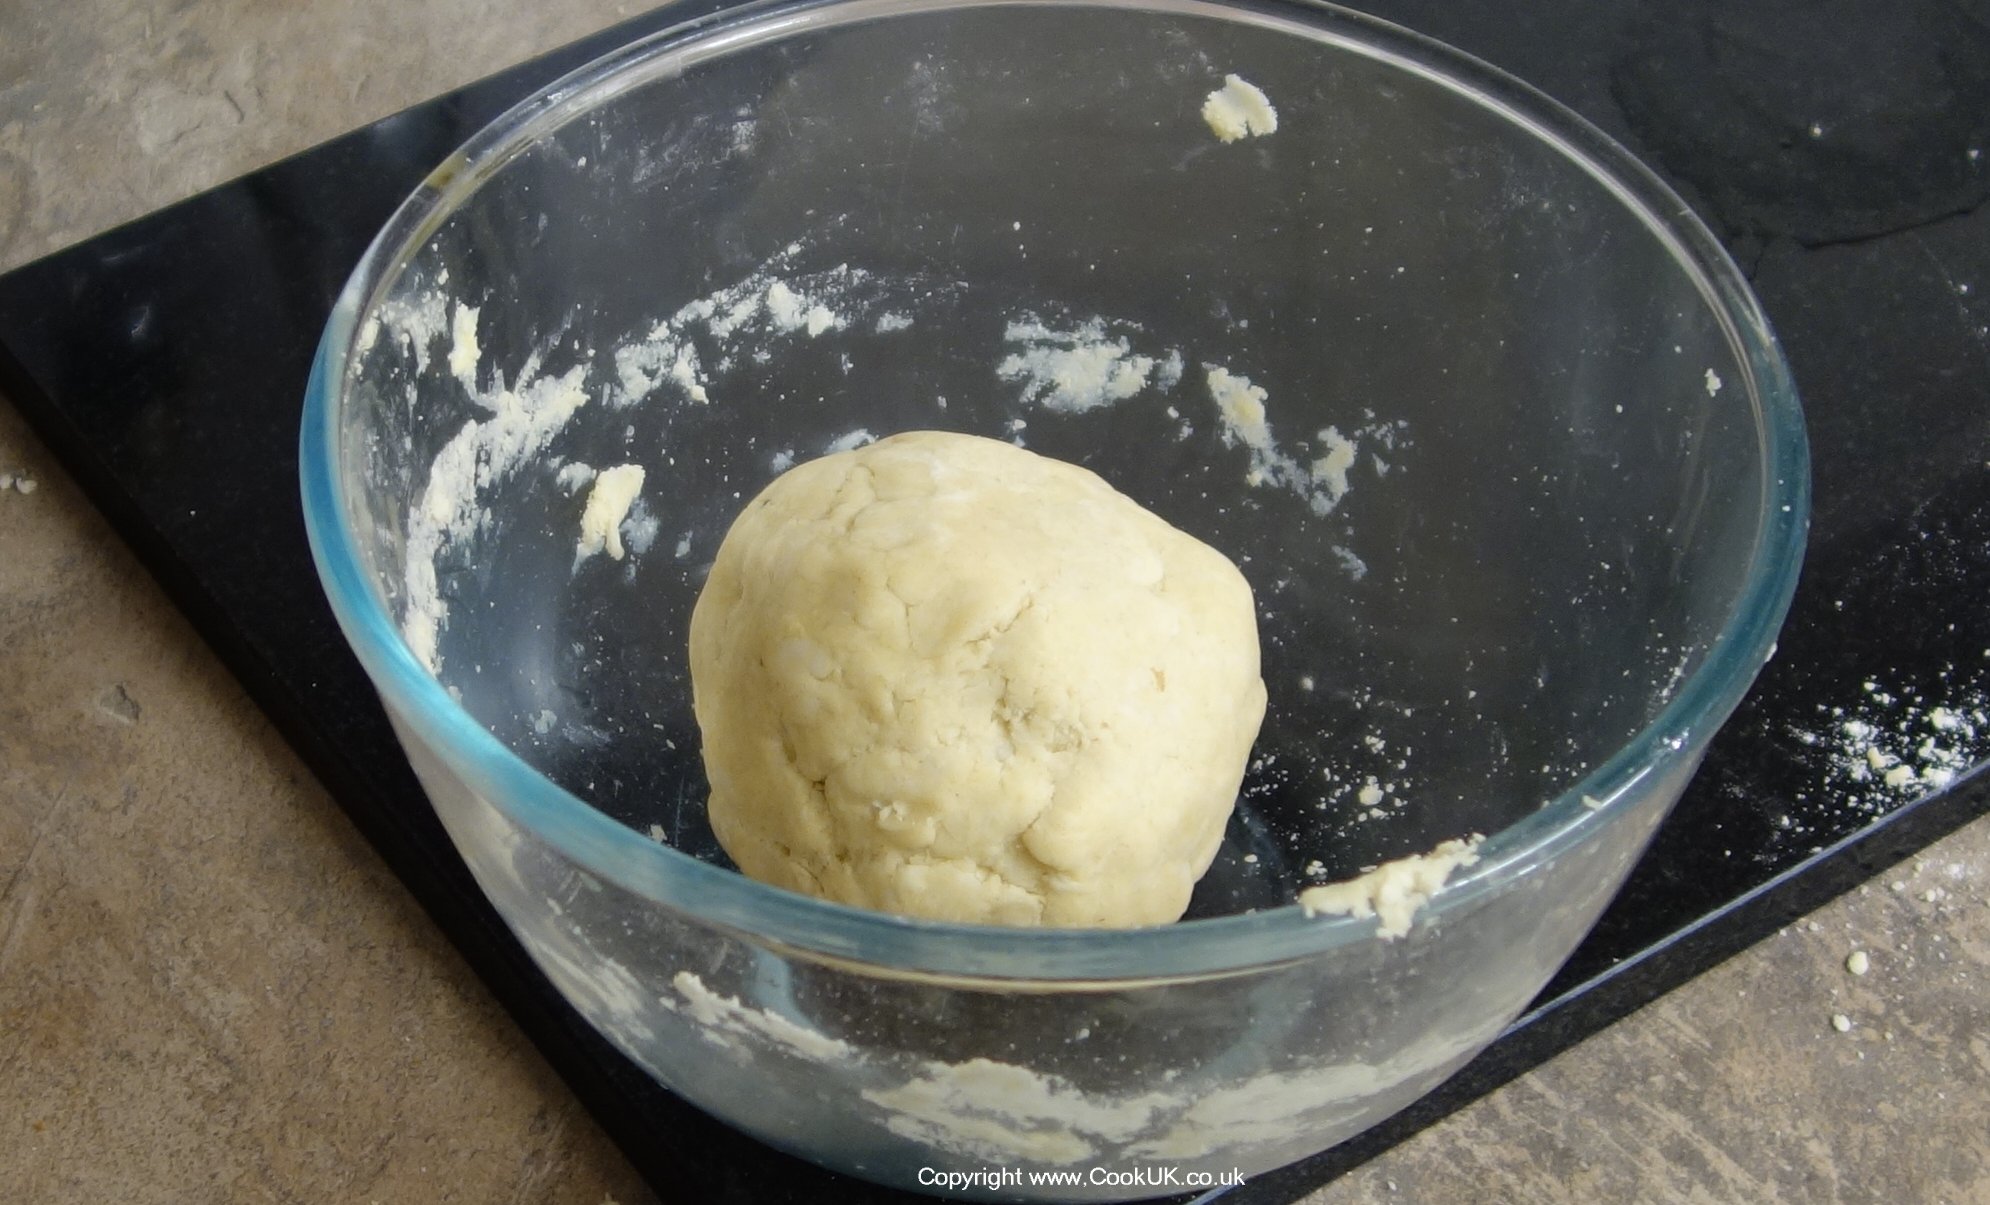
The mix is of the correct consistency when it is in a ball and can collect all the odd bits around the bowl into one single ball.
Wrap the mix in cling film and place it in the fridge for 30 minutes to 'rest'. After it has rested for 30 minutes it is ready to be rolled out into the shape required. We have assumed for this page that you want to line the bottom and top of a fruit pie.
![]()
Shortcrust pastry in a ball shape
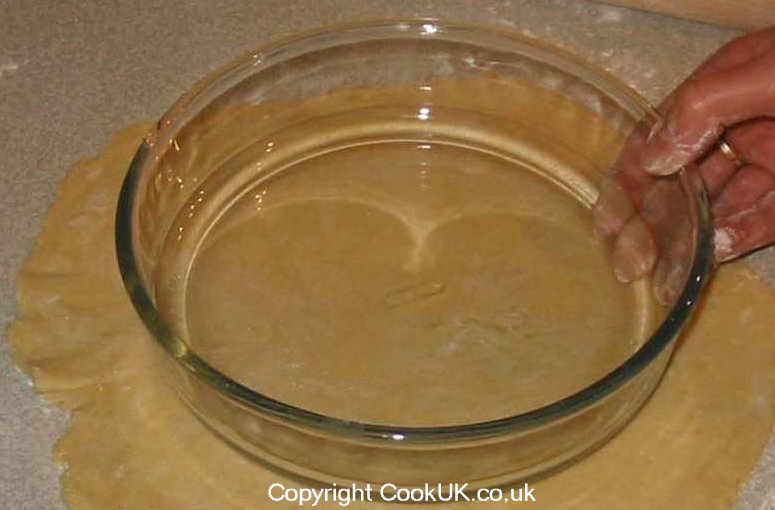
Move the rolling pin back and forwards turning the pastry round frequently to get a round shape. keep dusting the surface with more flour if the pastry starts to stick. Use the base of the dish to be lined as a guide to size.
Remember to allow sufficient size of pastry for the base of the pie dish AND the sides (see next step below).
As far as thickness of shortcrust pastry goes, aim for the thickness of a one pound coin, which is precisely 2.8mm.
![]()
Measuring size for shortcrust pastry
Gently firm the pastry into the bottom of the pie dish. It's not a disaster if the pastry tears slightly because when the pie is filled the base will not be very visible.
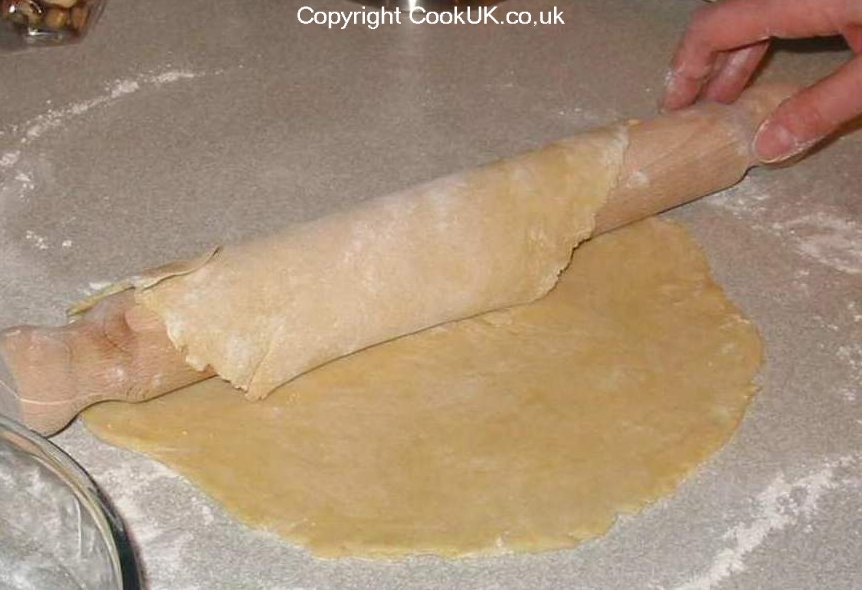
![]()
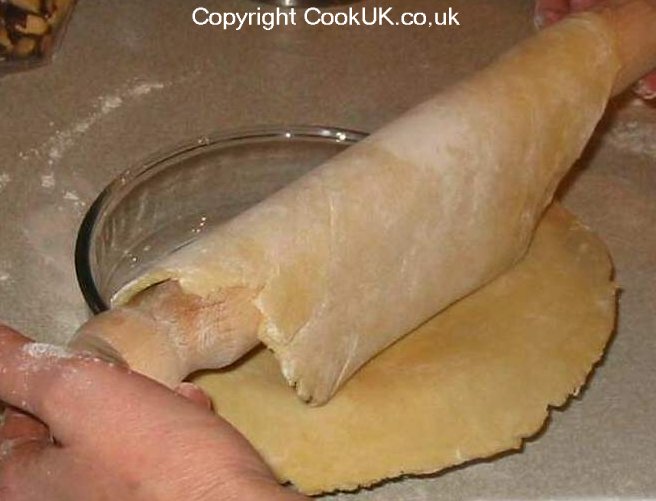
Shortcrust pastry onto rolling pin
![]()
Transfer pastry to pie dish
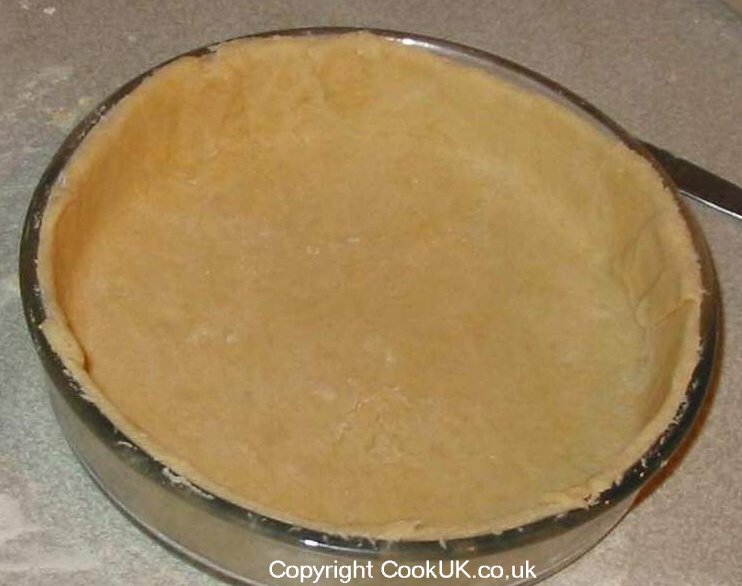
![]()
Shortcrust pastry lining pie dish
Fill the pastry lined dish with whatever is your choice of fruit. Roll out the remaining third of the pastry with the rolling pin to just larger than the top of the pie dish. Transfer the pastry to the top of the pie dish using the rolling pin as before.Gently firm down the pastry over the top of the fruit and trim the excess pastry off with the blunt side of a knife.
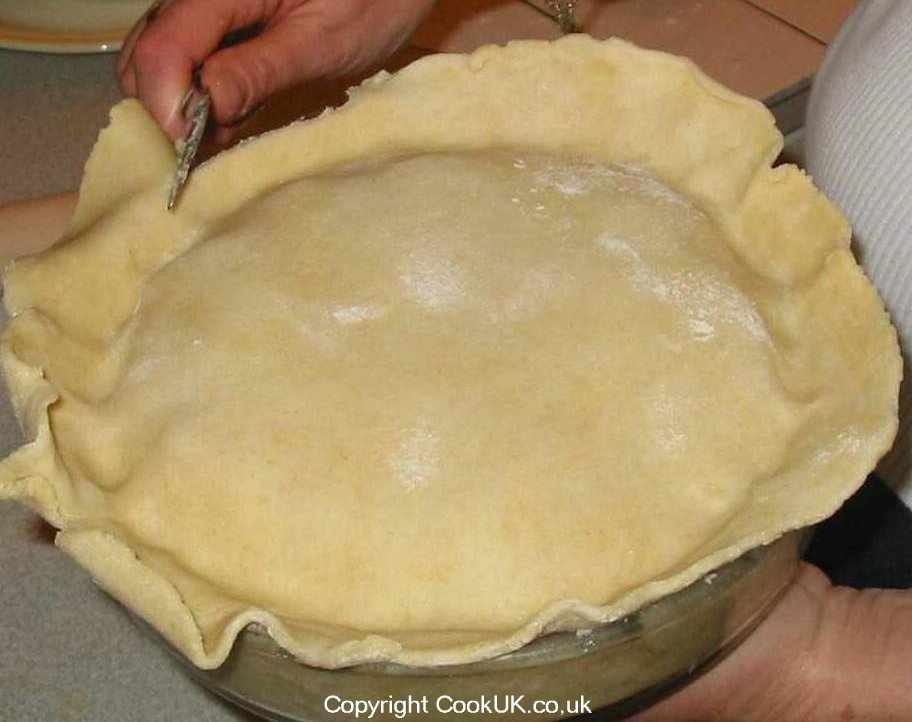
![]()
Shortcrust pastry topping
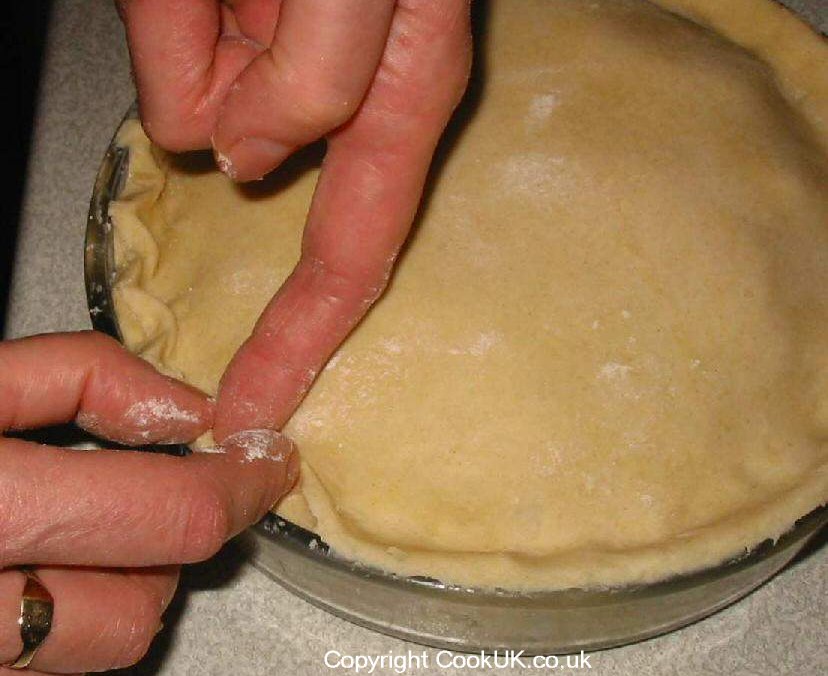
![]()
Crimping shortcrust pastry edges
VIDEO HOW TO CRIMP EDGES OF SHORTCRUST PASTRY
This will allow steam to come out whilst the pie is being baked and help to keep the shortcrust pastry crisp.
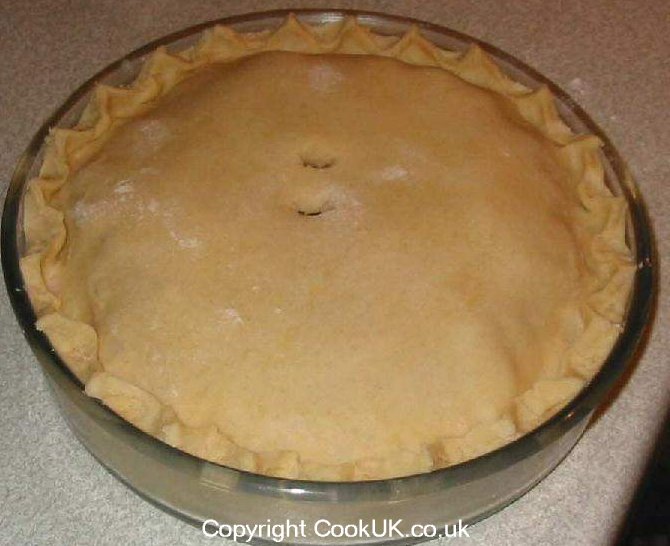
![]()
Holes in top of shortcrust fruit pie
If you are cooking a fruit or meat pie, cook for a further 30 to 40 minutes until the shortcrust pastry is golden brown and the pie filling has cooked through.
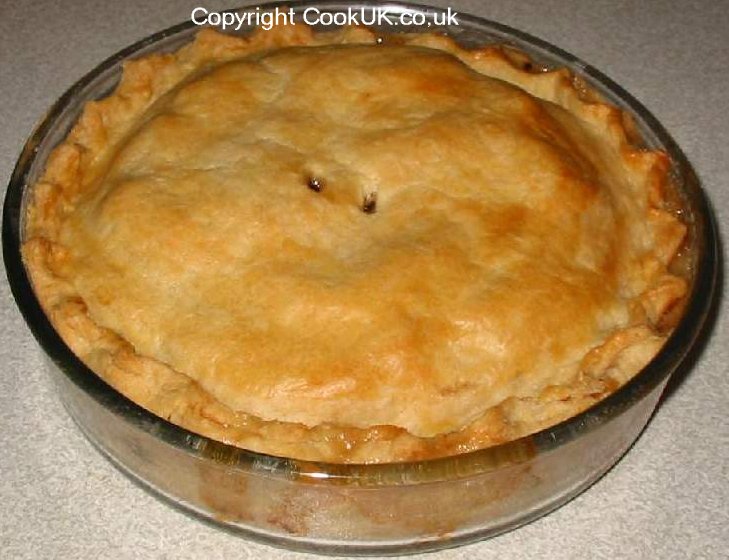
![]()
Cooked shortcrust pastry pie