|
How to Defrost and Clean Your Freezer |
|

The key maintenance tasks required for a freezer are
defrosting and cleaning (even frost free freezers need this).
|
|
MINIMISING THE NEED FOR DEFROSTING
Frost is formed on the interior of a freezer when warm air enters and
is trapped inside when the door is closed. Chest freezers are less likely
to suffer from frost because even when the door is opened a blanket of
cold air prevents most warm air from entering.
Frost free freezers have various mechanisms to prevent the formation
of frost (see our page on frost free freezers by
clicking here) but even they
require occasional de-frosting if only to clean them.
A very common cause of excessive frost formation is placing large
amounts of warm food in the freezer at one time. Freezers can only cope
with freezing small amounts of warm food at any one time. A fast freeze
function helps in this respect (see our fast-freeze page by
clicking here).
Freezers should be defrosted annually to clean them or when the ice on
the interior is about 1cm (½in) thick.
HOW TO DE-FROST
Timing is important because de-frosting a freezer will take at least
three hours and frozen food will de-frost in that time. So plan the
de-frost ahead and run down the contents of your freezer to the minimum.
Step 1
Unplug the freezer from power source.
Step 2
Remove all the food in the freezer and place it either in the fridge or
wrap in newspaper and store in cool bags in the coolest part of the
house.
Step 3
Place some newspapers on the floor around the front of the freezer. The
paper will absorbs any spills.
Step 4
The next step is to help the ice melt as soon as possible. Some people
recommend using a hairdryer to melt the ice but ice / water and
electricity do not mix, so forget that idea!
Instead, remove all baskets from the freezer and place two bowls of
hot water in the interior of the freezer. The door of the
freezer can be shut or left open.
Step 5
Whilst the ice is melting, wash out all the baskets in soapy water using
a dish cloth. Rinse and leave them to dry.
Step 6
Using your hands only (no sharp instruments), remove any lumps of ice
from the interior. Wiping a cloth dipped in warm water over the ice
surface will help the ice to melt quicker. When the water in the bowls
inside the freezer has cooled, throw the water away and replace with more
hot water.
Step 7
 |
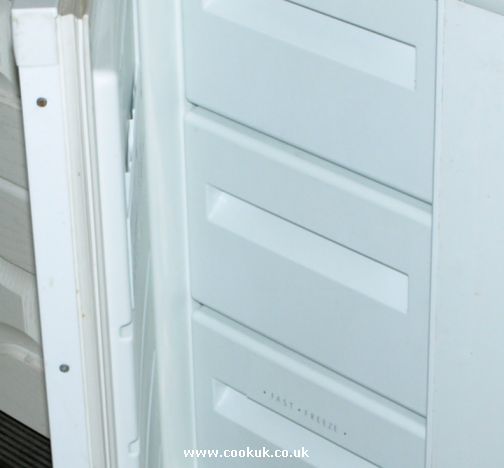
When all the ice has been removed, wipe out the inside of the
freezer with warm damp cloth to give the interior a good clean.
Make sure that you clean the door seals (see picture, click to
enlarge it) because if dirt accumulates here the freezer door will
not close properly. |
Step 8
After cleaning the interior, turn on the freezer, replace all the shelves
and shut the door for 15 minutes. Now unpack all the food and and put it
back in the freezer.
GO BACK TO
FREEZER COOKING INDEX
GO TO NEXT SECTION ON
FREEZER COOKING
|