![]()
The variety of apples you use is key to a top quality apple pie. We suggest some excellent apple varieties which are readily available in most supermarkets and your local grocer .
We hope our instructions and video describing how to make shortcrust pastry convince you that even amateur cooks are quite capable of making excellent shortcrust pastry. However, perfectly adequate ready made pastry is available in almost all supermarkets.
FOR THE PASTRY
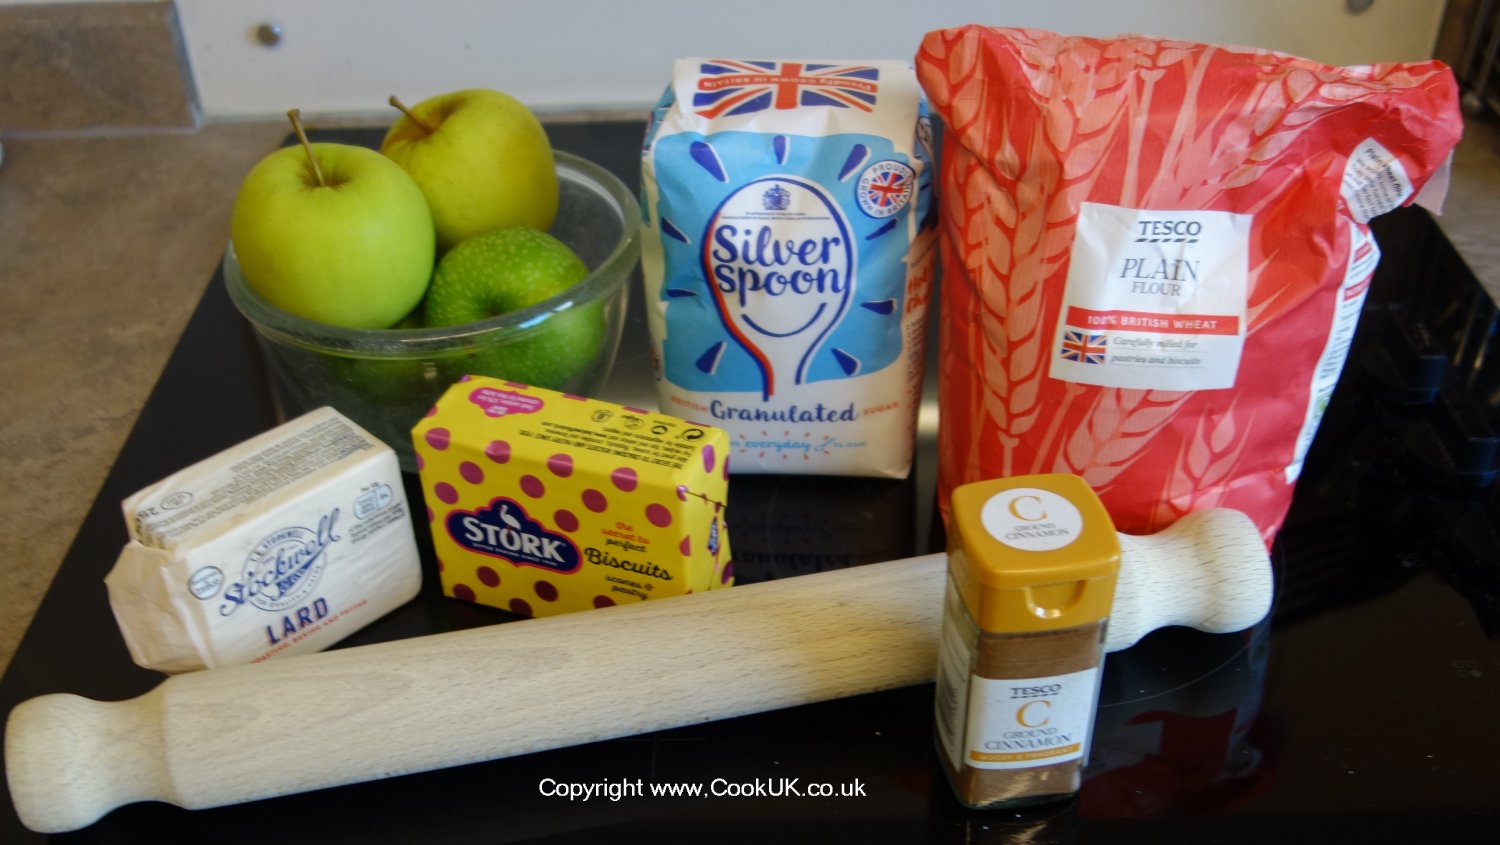
85 grams / 3oz cooking margarine (e.g. Stork). Use from a solid block of Stork, not spreadable (see the picture of ingredients below)
85 grams / 3oz lard
340 grams / 12 oz plain flour plus a very small amount more for use in rolling out the pastry
Four and a half tablespoons of water
FOR THE PIE FILLING
700g cooking apples (3 to 4 large apples). See the section "Advice for Apple Pie" below for the best varieties to choose
85 grams / 3 oz sugar
Three quarters a teaspoon of ground cinnamon
![]()
Ingredients for apple pie
When apples are peeled and especially when sliced, their attractive white colour can very quickly turn a 'not-so-attractive' brownish colour. This makes no difference to the taste, but 'looks' are important. The method described below therefore leaves the peeling and cutting of the apples to the last minute.
Apple pie can be frozen cooked or uncooked. With cooked apple pie, ensure it has cooled completely. To freeze both cooked and uncooked apple pie, wrap it in two layers of kitchen foil, label it and place in the freezer. Both cooked and uncooked apple pie will keep in the freezer for six months.
Step by step pictures on making the shortcrust pastry are shown in the following recipe but you can also view our video immediately below for a practical demonstration.
As far as which variety of apples make good apple pies, I will simplify it. If you are using just one variety of apple, Bramleys would be our choice. They provide a good apple flavour whilst retaining good texture.
Our absolute favourite however would be a combination of one third Golden Delicious and two third Bramleys. The Bramleys contribute considerably to the texture of the ideal apple pie. The Golden Delicious have reasonable texture and also provide that all important deep apple flavour.
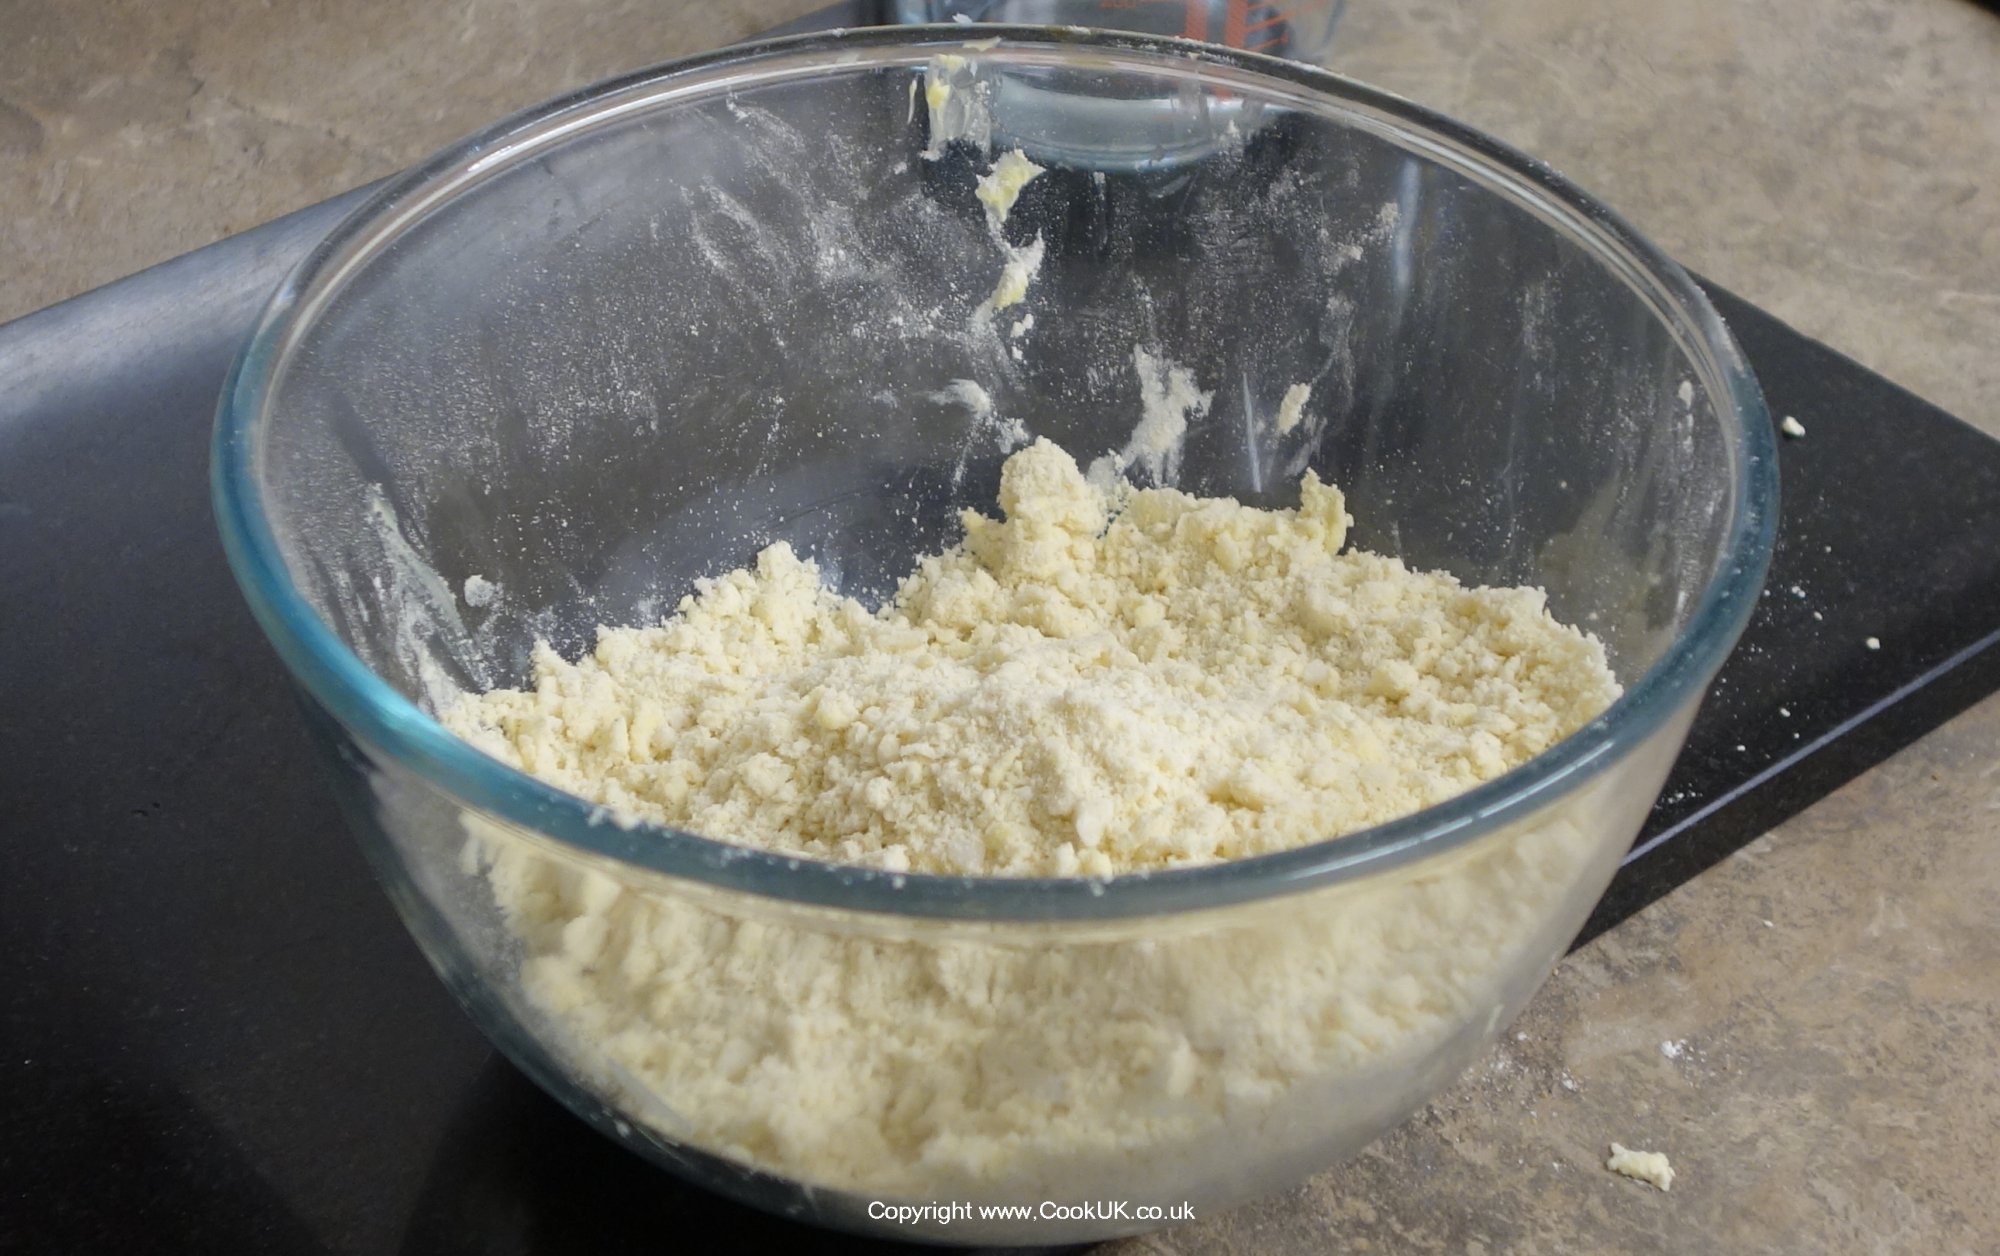
Cut the lard and cooking margarine into smallish blocks, this will speed up the mixing process. Put the blocks of cooking margarine (Stork or similar) and lard (Cookeen can be used if you are vegetarian) in a mixing bowl and pour in the flour. The yellow 'bricks' in the picture are margarine, the white bricks are the lard.

![]()
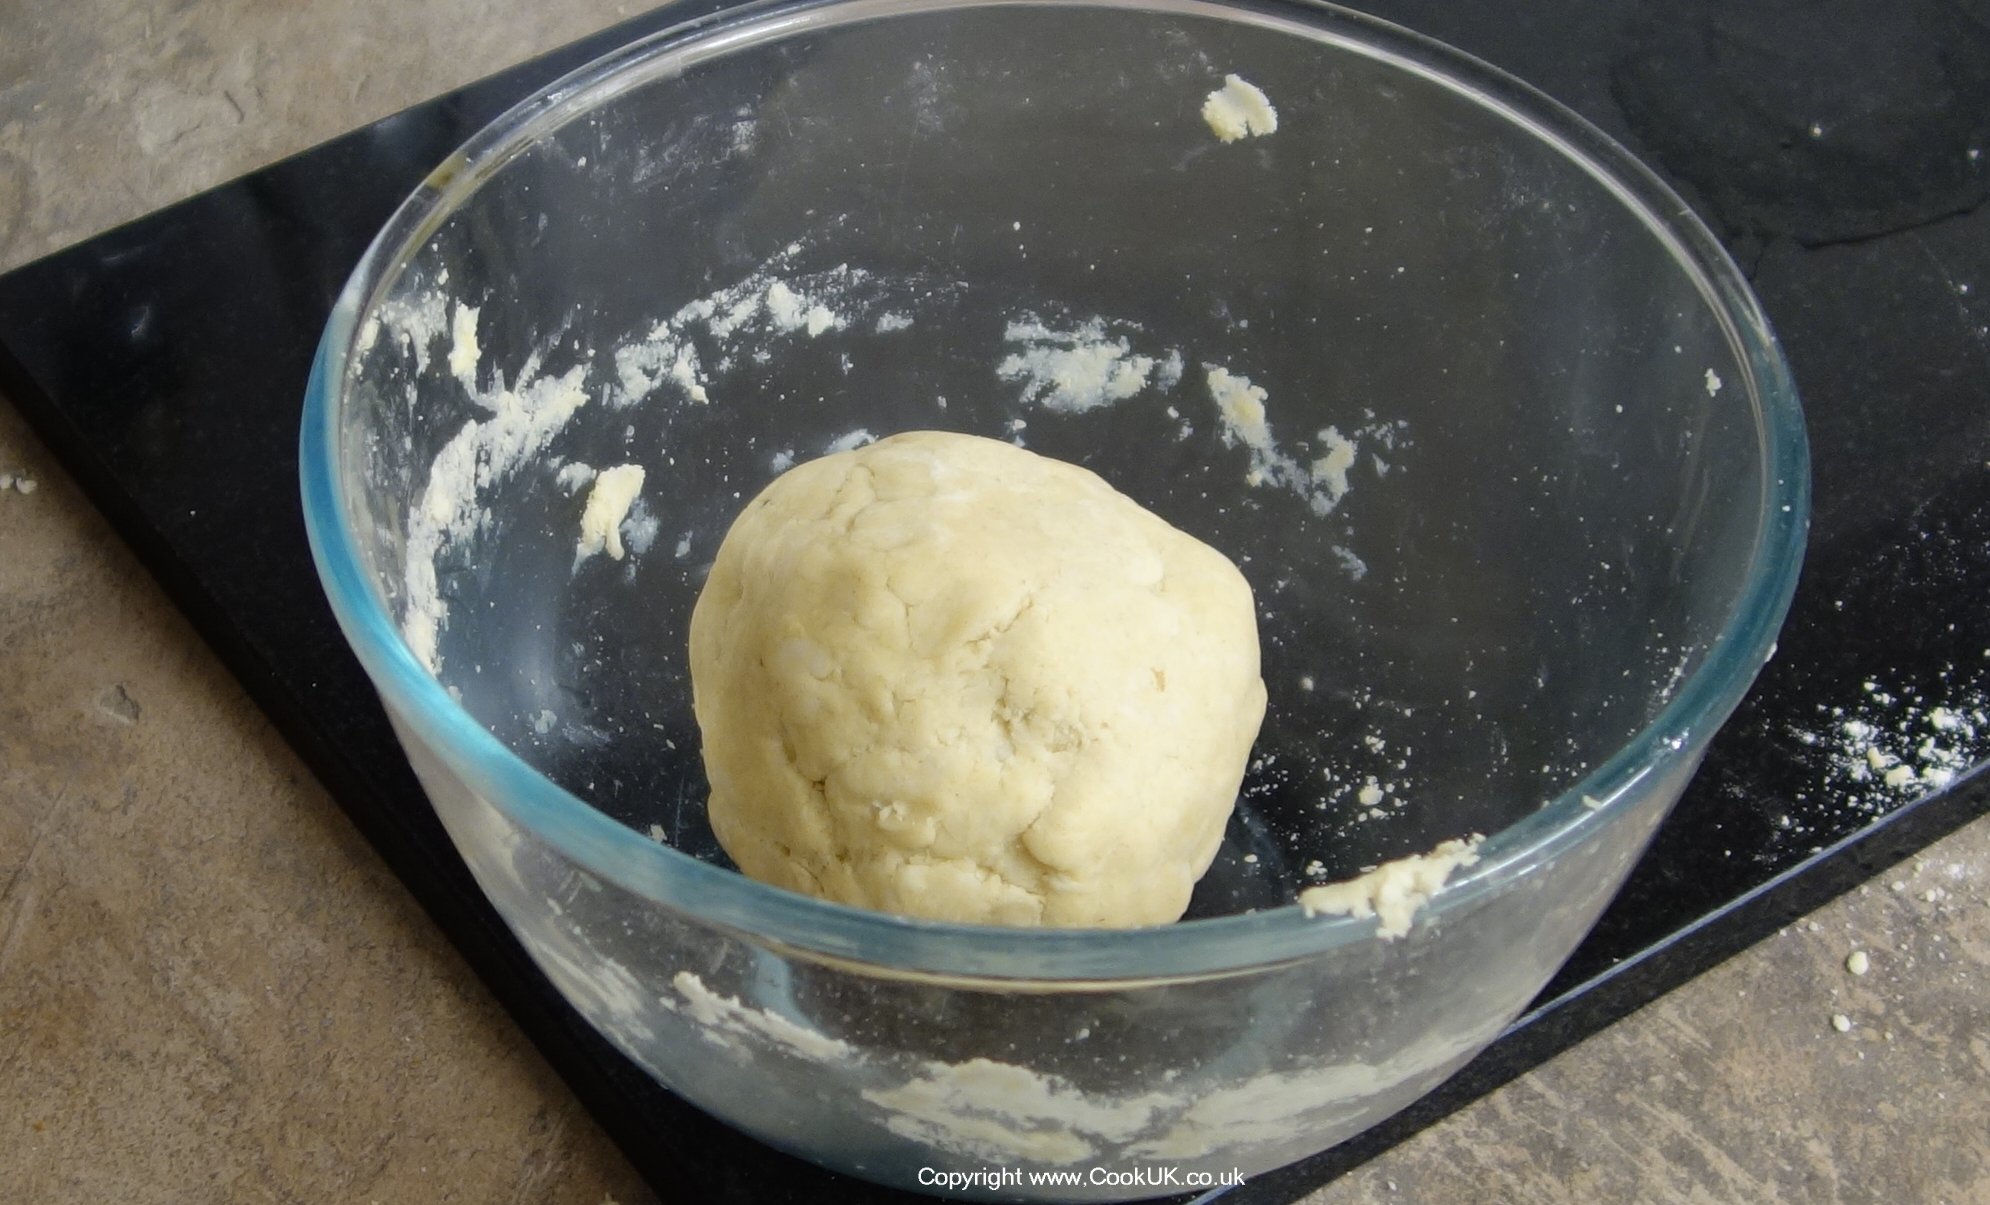
This stage should only take a minute or so but it's one of the joys of making apple pie. It is well worth watching the video on making shortcrust pastry above for advice on how best to mix the ingredients.
![]()
If the mixture refuses to form a ball, add a teaspoon or two (not a tablespoon or two) of water and mix that in.
Wrap the pastry ball in cling film and put it in the fridge to 'rest' for half an hour. It can be prepared in advance and left in the fridge for a couple of days.
![]()
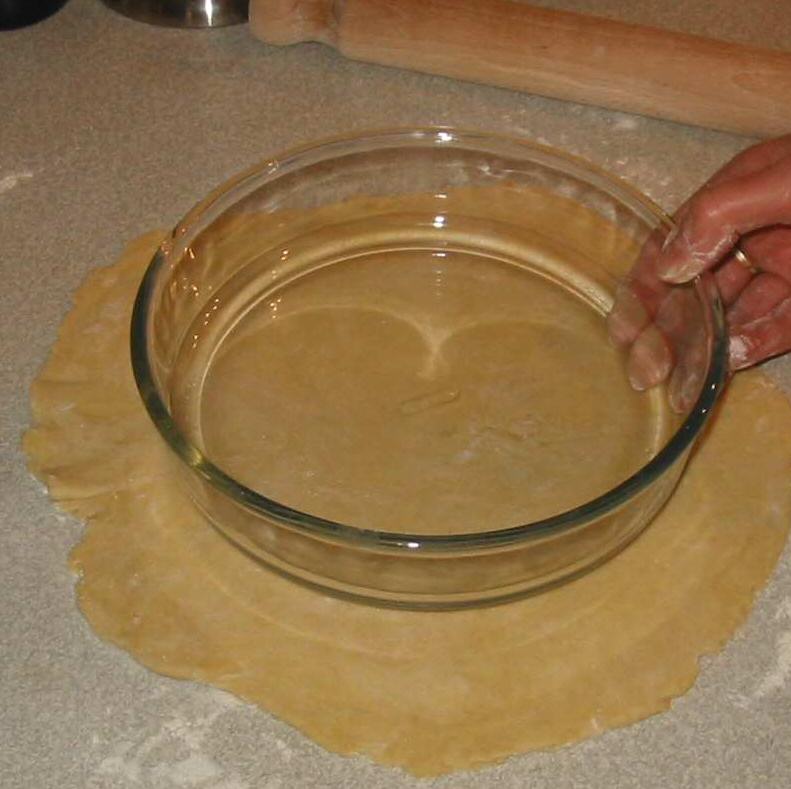
After half an hour, take the pastry from the fridge, and separate roughly two thirds of it. Lightly sprinkle flour on the rolling pin and the surface to be used for rolling out the pastry. Roll the two thirds of the pastry out with a rolling pin so that it is large enough to line the base and sides of the pie dish.
Put the pie dish over the rolled pastry to make sure it is about the correct size also allowing for the pastry to cover th side of the dish. The pastry at this stage should be approximately 3mm to 5mm thick.
![]()
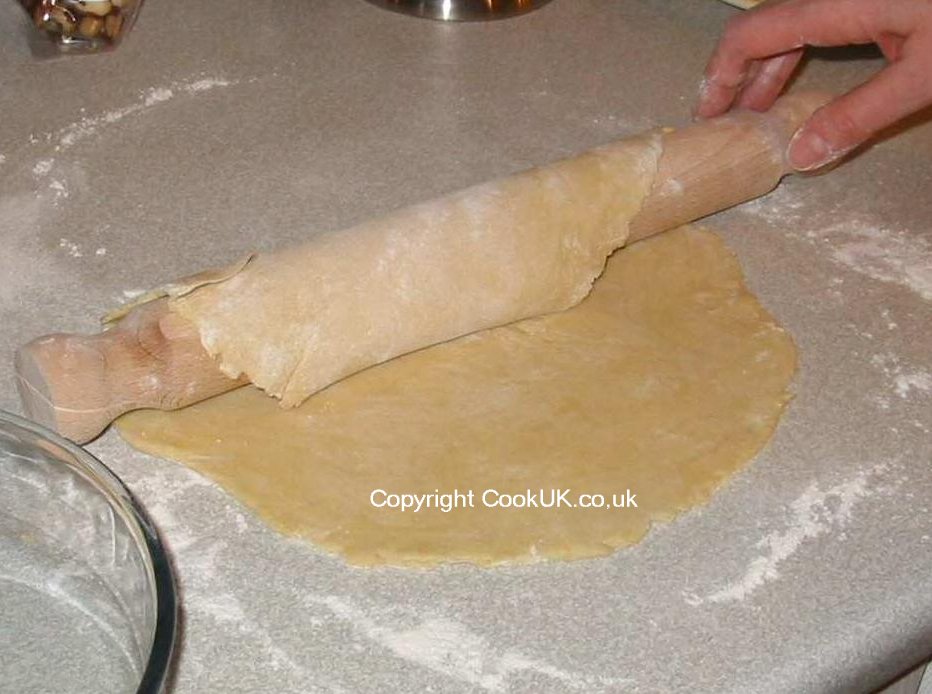
The idea is to pick up the rolled out pastry and put it in the dish to form the base and sides of the apple pie. Note that the method used to pick up the pastry can also be seen in the video earlier on in this page.
![]()
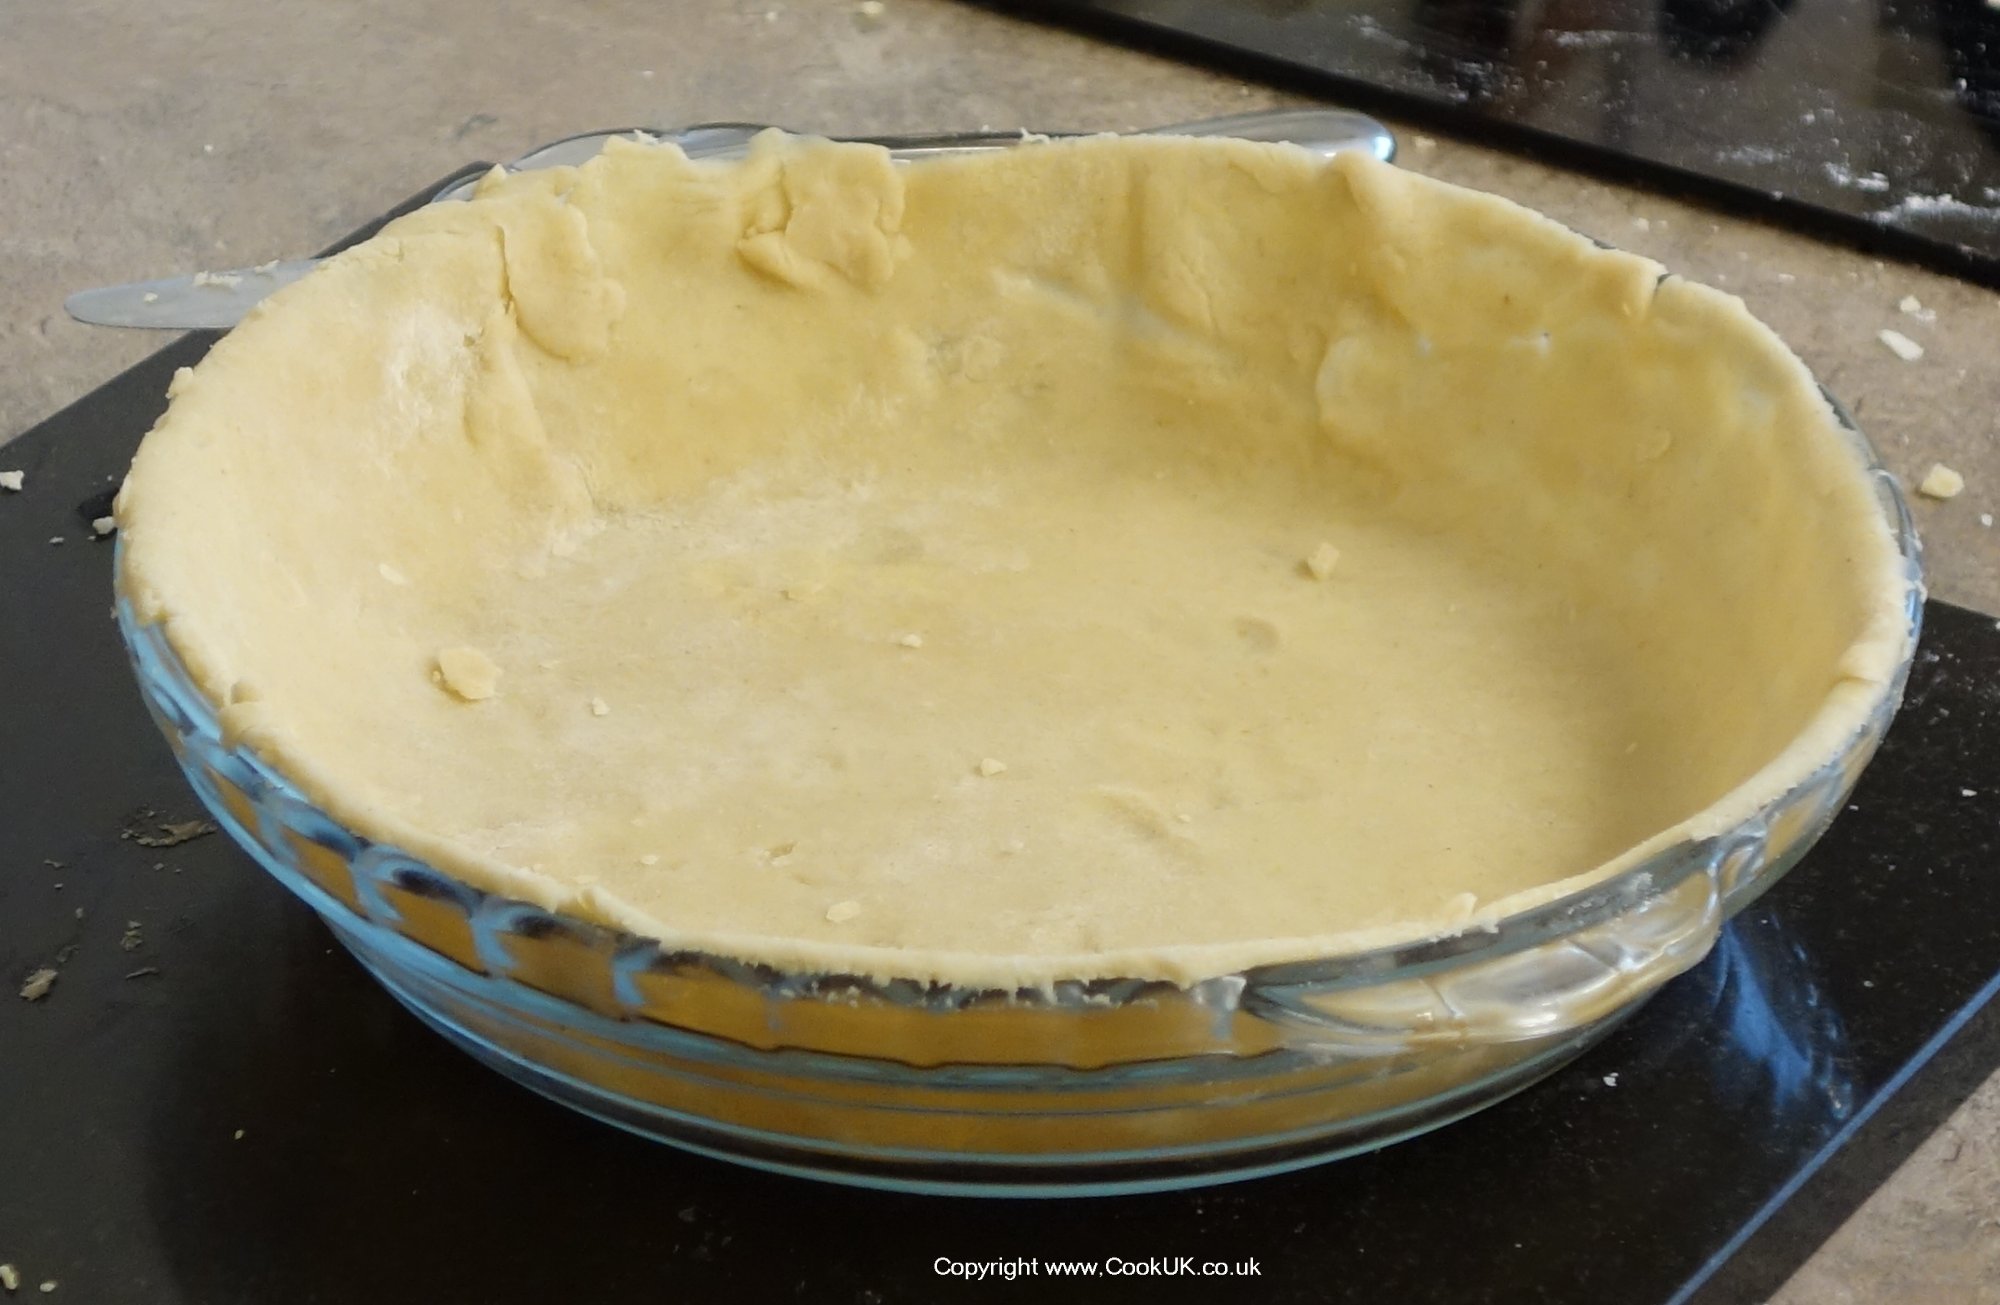
Gently ease the pastry into the base of the dish and gently firm it round the sides.

![]()
Then trim off the excess pastry from the top. Do this with the 'blunt' side of a knife - the blunt side is far less likely to tear the pastry.
Turn your oven on now so that it's pre-heated ready to cook later on. Heat settings are 220°C / fan 200°C / 425°F / Gas Mark 7. Place a baking tray in the oven to pre-heat, this will help the base of the pie to crisp up when it is initially placed in the pre-heated oven.
![]()
Absolute accuracy is not so important. The thicker the slices, the more firm the apple mixture will be when it has been cooked.
STEP 9Place the apple slices into the pie bowl on top of the base pastry. Ensure the surface of the apple layer is relatively even.
Using water and a pastry brush (or your wet fingers) dampen the top edge of the pastry. This will help the top pastry lid to attach firmly to it better.
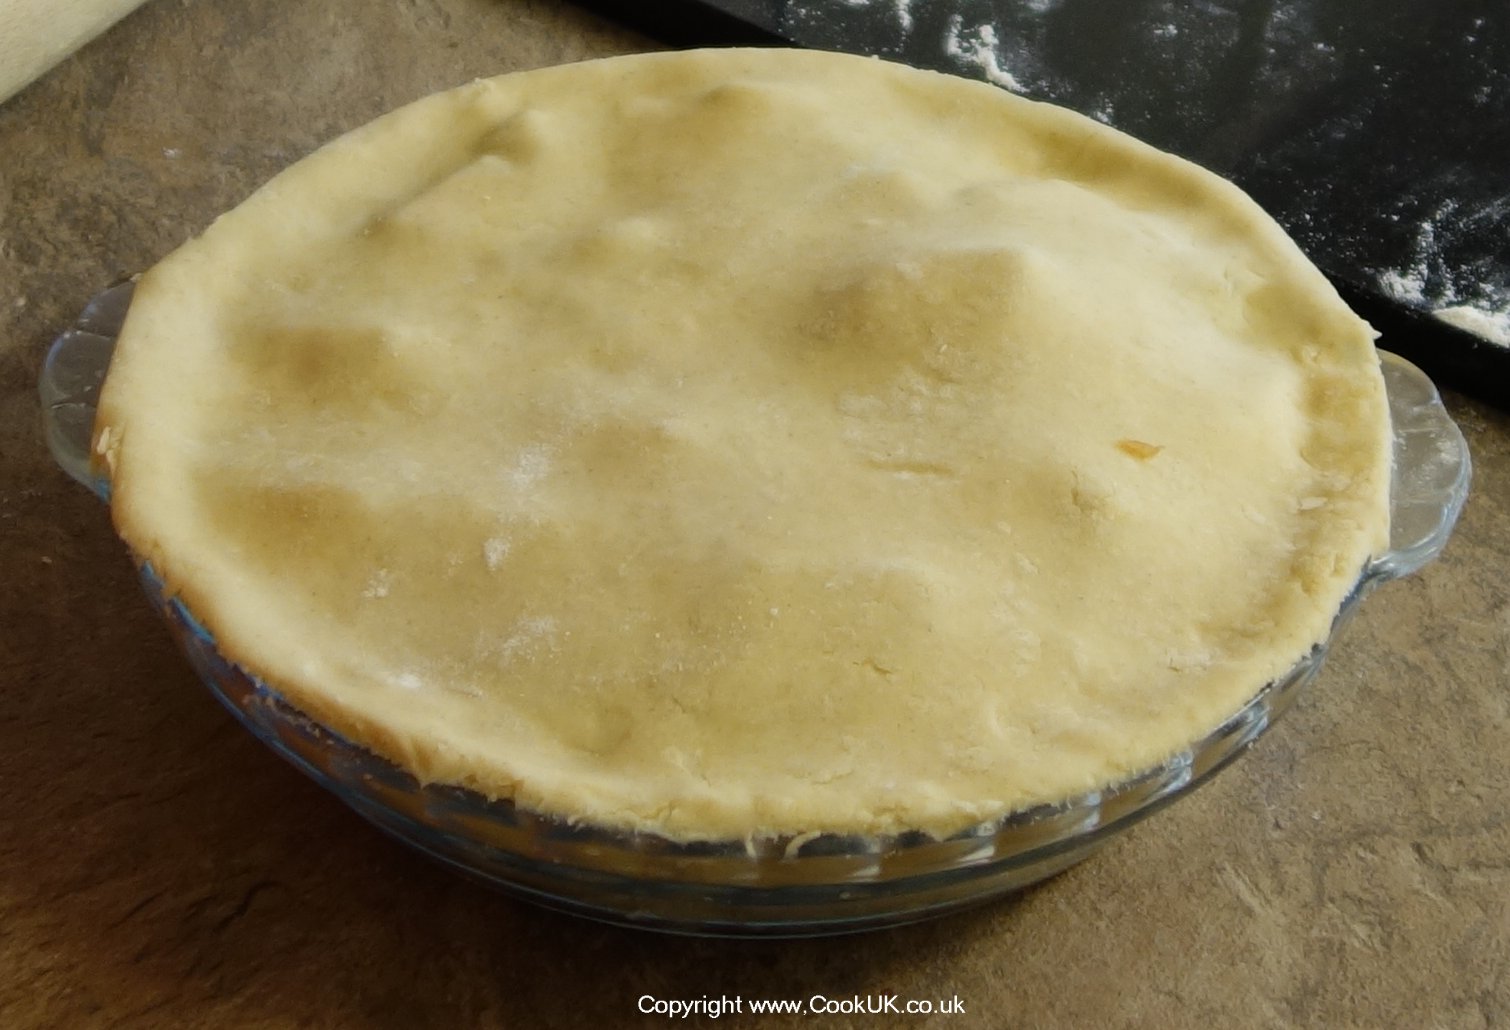
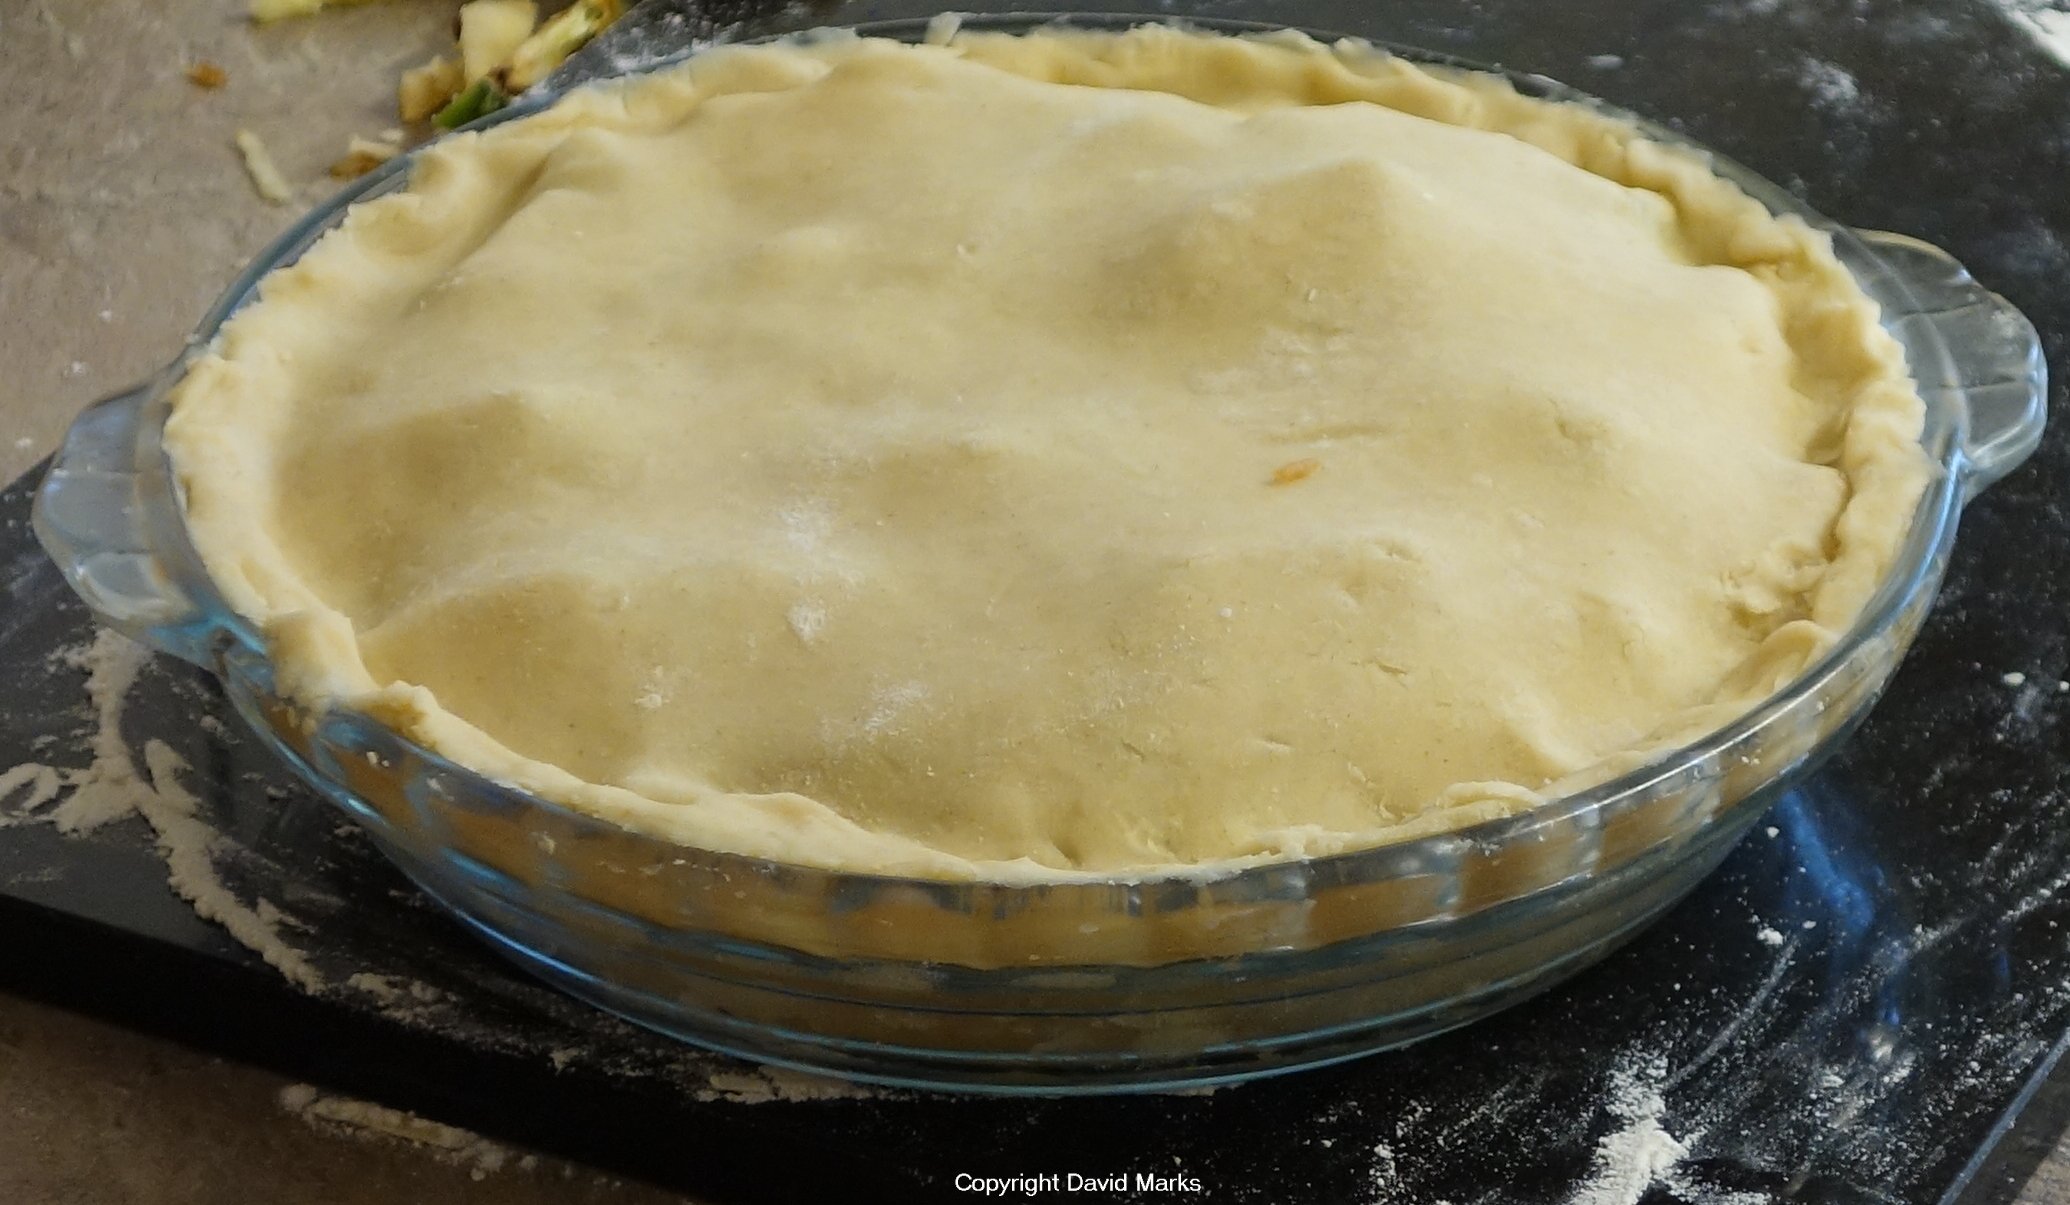
STEP 10Transfer the rolled out pastry to the top of the pie using the rolling pin in the same way described in step 5 above for the base pastry.
Tuck the pastry down at the edge and remove the excess pastry using the blunt edge of a knife.
![]()
![]()
Lightly brush the top with a little milk to give the top of the pie a light brown colour when cooked.
STEP 13Ovens vary so the above timings are approximate. The pie is cooked when the pastry is light brown.

![]()
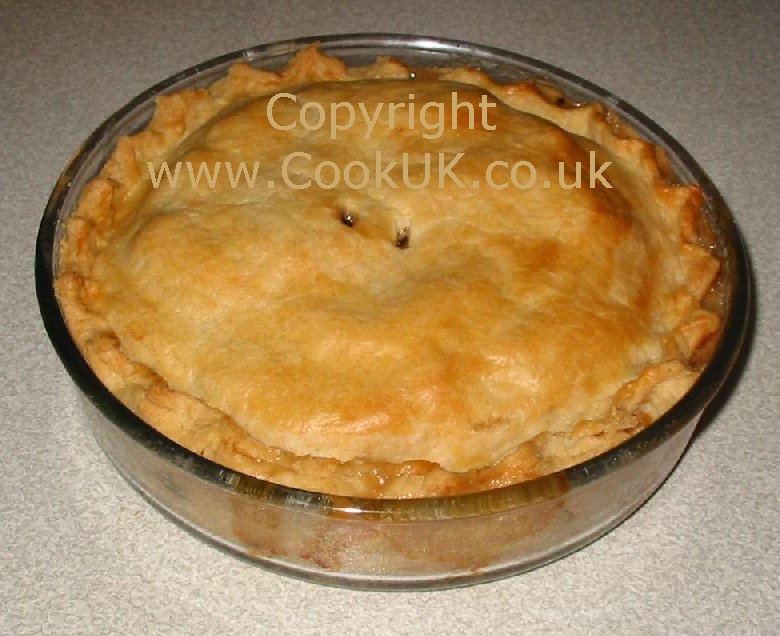
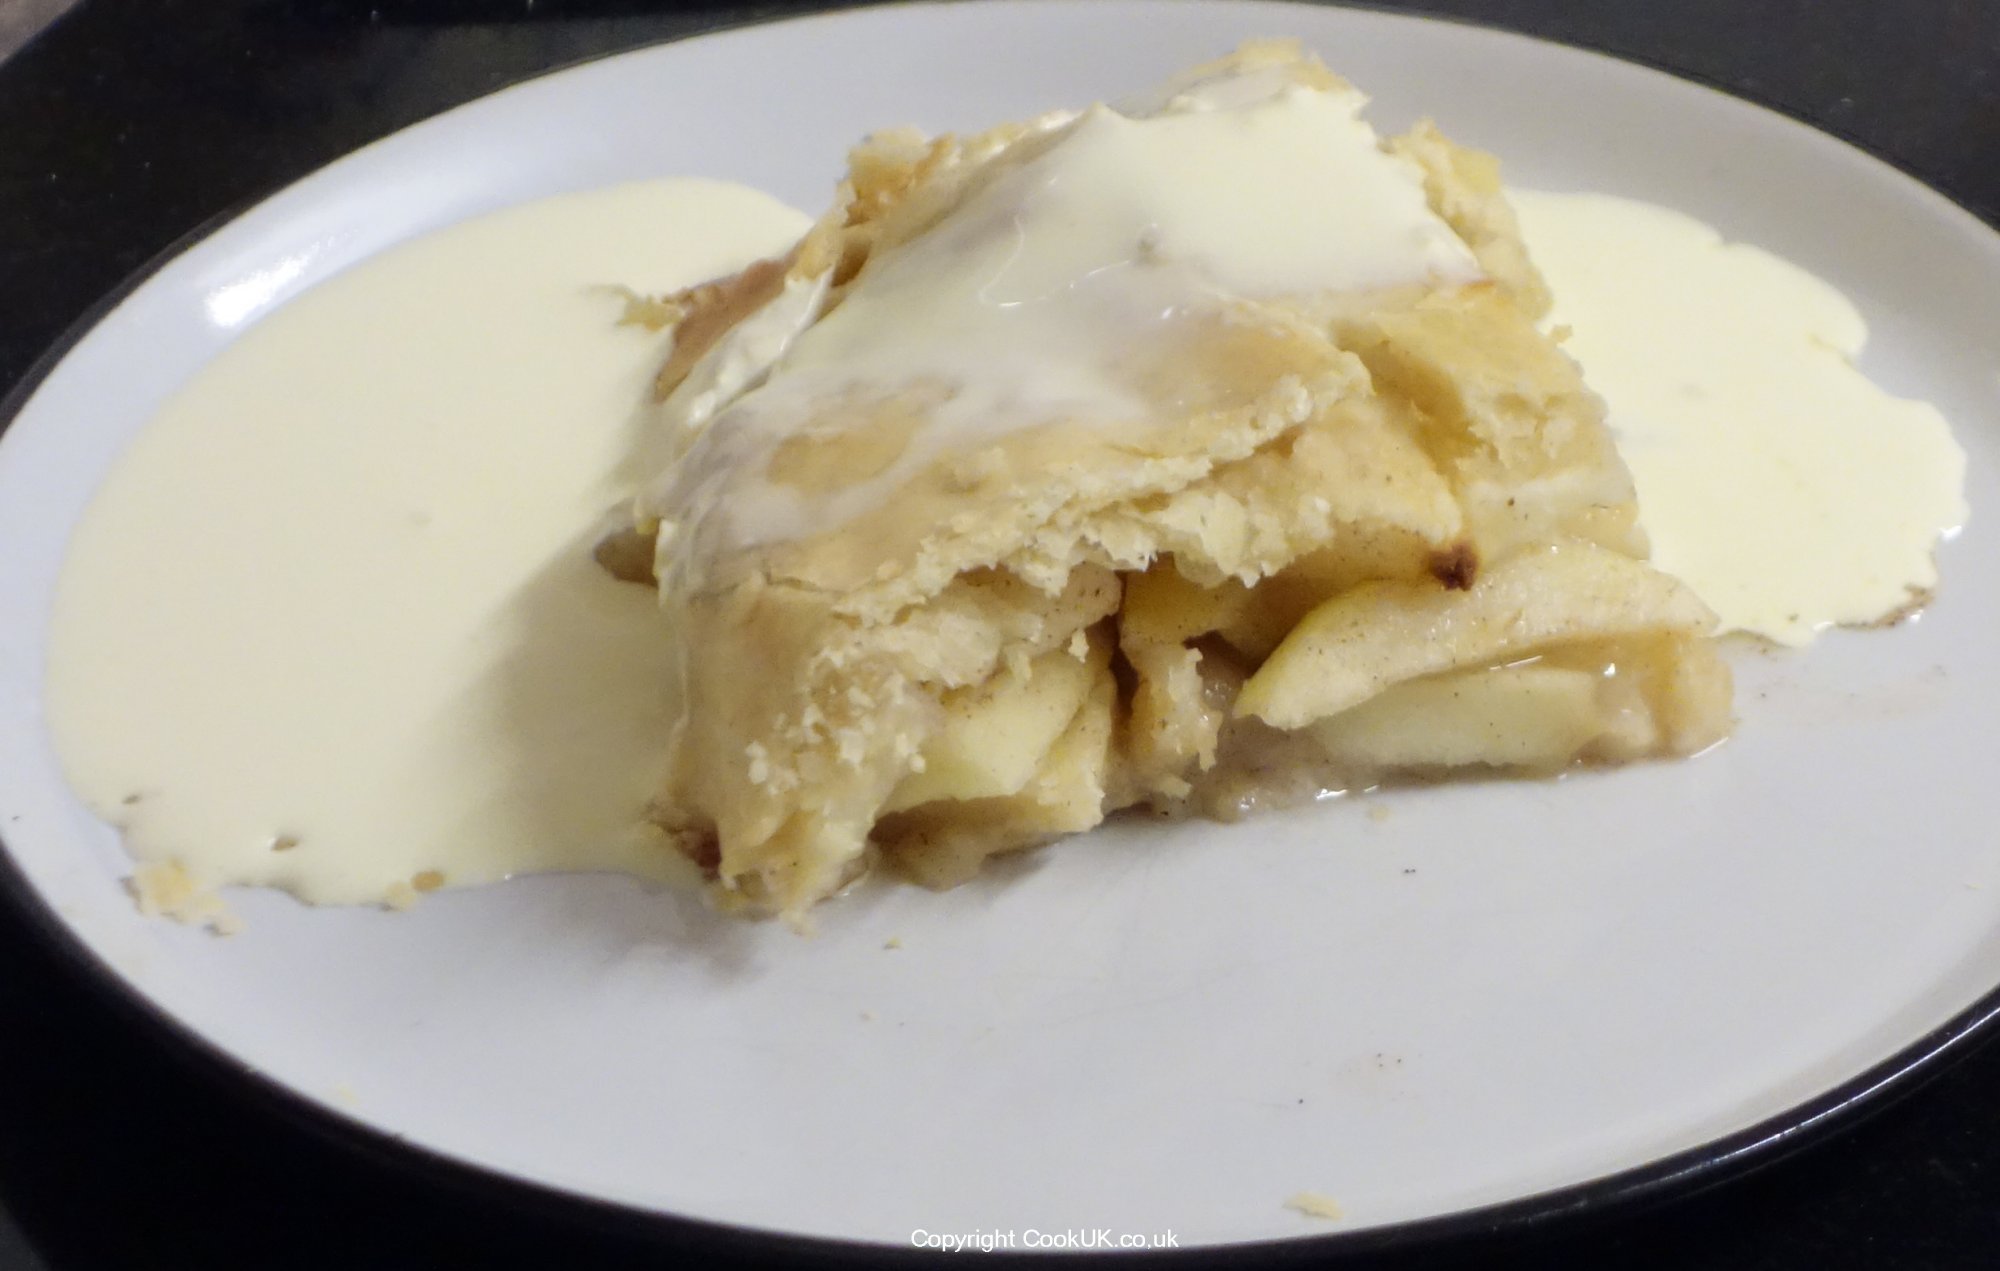
Serve hot or cold with ice cream, cream or custard.
![]()